Skip to content
View our Accessibility Statement
Skip to product information
1 of 12

Wyze Window Cam

Wyze Window Cam

Outdoor monitoring with no glare.

Wyze Window Cam (Quantity)
$49.98CAD
In stock
Get it as soon as
30-day hassle-free returns.
In stock
A blue and white logo for Wyze.
Wyze.com Exclusive BENEFITS
18-month extended warranty

Get an 18-mo extended warranty when you buy this product on wyze.com. Also get special bundles, unique promos, + rewards with each order

  • No Tools, Just Stick It
  • Upgraded Color Night Vision
  • Specialized Design to Reduce Glare
  • AI-Powered Motion Detection & Alerts
  • 24/7 Local Recording with MicroSD Card
  • Easy Setup with Bluetooth®
  • Timelapse Video Mode
  • Alexa, Google Assistant, IFTTT Support
View full details
  • Upgraded Color Night Vision

    Upgraded Color Night Vision

  • Easily Mount Inside Window

    Easily Mount Inside Window

  • AI-Powered Motion Detection

    AI-Powered Motion Detection

  • Local Recording to MicroSD Card

    Local Recording to MicroSD Card

Wyze Window Cam Specs

Color & Materials
  • Color: White
  • Finish: Textured Matte
  • Model: WYZECWC
  • Image Sensor: 1/2.9' CMOS (1920 x 1080)
Dimensions
  • 2.05 in x 2.05 in x 2.05 in (52 mm x 52mm x 52mm)
Weight
  • 2.75 oz (76 g)
Power
  • Power Adapter: Input - 100-240V ~50/60Hz Output - 5V/1A
Additional Details
  • Power Cable Length: 10 ft (3 m)
  • Ports: 1 micro USB
  • Digital Zoom: 8x
  • Field-of-View: 120°(DFOV), 101°(HFOV), 53.9°(VFOV)
  • Audio: Built-in 100dB Speaker & Microphone; Noise & Echo Cancellation
  • Local Storage: Supports up to 512 GB microSD in exFAT format
Connectivity & Compatibility
  • 802.11 b/g/n, 2.4 GHz Wi-Fi, Wi-Fi 4/5/6
  • Phone Compatibility: Android 9.0+, iOS 15.0+
  • Integrations: Alexa, Google Assistant, IFTTT
Weather & Temperature
  • Weather Resistance: Indoor Only
  • Operating: -14°F - 113°F (-10°C - 45°C)
  • Storage: --40°F-158°F (-40°C-70°C)
Language
  • English
Warranty
  • 1-Year
  • Wyze Window Cam
  • 2x Mounting Stickers
  • Cable Clips
  • 10' USB Cable
  • Indoor Power Adapter
  • Quick Start Guide

Outdoor security. Inside.

No Tools. Just Stick.

No drilling. No permanent hardware. The secure hook-and-loop fastener mounting sticker makes installation simple.

Upgraded Color Night Vision

See in full color. even in near-darkness.

Anti-Glare Design.

Glare beware. Engineered to eliminate glare and reflections for crisp & clear window footage.

AI-powered detection & alerts.

Window cam knows what matters

Extended Power Cable

We've included an extra-long 10 ft power cable with cable clips for tidy mounting.

Timelapse video.

Create stunning time-lapse videos of a sunset or track project progress.

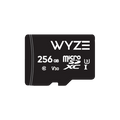
24/7 Recording with Wyze MicroSD card

Store days, weeks, or months of footage locally.* No subscriptions. No cloud requirements. Ever.

*microSD card required (sold separately)

Easy Bluetooth Setup & WiFi 6

Easy Bluetooth pairing and Wifi 6 performance means faster pairing, stronger connection, and rock-solid streaming —even on busy networks.

Setup takes seconds.

More to Love

Missed something? Of you course you didn't. Because you're using a camera that's backed by the world's best smart home app. Just tap to review recorded events from wherever you are.

Monitor specific areas for motion so you only receive notifications when it matters.

Convenience and customization at your fingertips with integrations like Amazon Alexa, Google Assistant, IFTTT, and Wyze Automations. 

Wyze Window Cam Support Docs

Before you begin setup:

  1. Download the Wyze app on your smartphone or tablet.
  2. Connect your device to a 2.4 GHz Wi-Fi network.
  3. Unpack your Wyze Window Cam box, removing all plastic and packing materials.Be sure to remove the plastic film from the lens.
  4. Plug each camera you want to set up into power using the included USB cable and power adapter.The camera’s status light will turn solid red when powered. When flashing, it’s ready for setup.

To set up your Wyze Window Cam:

  1. In the Wyze app, tap Home, then tap + plus sign on the top right.
  2. On the Add menu, tap Device.
  3. Tap Cameras > Wired Camera > Wyze Window Cam.
  4. With your camera plugged into an outlet, tap Next in the app.
  5. If Behind the camera lens, single-press the SETUP button. It will say “ready to connect”.The camera may say “ready to connect” without pressing the SETUP button. If so, continue with setup.
  6. In the app, check the box next to I heard, “Ready to connect”.
  7. Tap Begin Setup.
  8. If BluetoothⓇ hasn’t already been enabled, you’ll be prompted to allow BluetoothⓇ access. Tap OK.If BluetoothⓇ has already been enabled, it will skip to the next step.
  9. Select your 2.4 GHz Wi-Fi network and enter your network password. Tap Connect.Tap the icon in the password field to display the password to ensure it was entered correctly.
  10. After the camera is set up and connected, it will say "Wi-Fi connected, setup complete”.
  11. Tap Complete. Your camera is set up, now it’s time to mount your device.Follow along in the Wyze app to install the mounting sticker and mount your camera. Then then continue below.
  12. Name your Wyze Window Cam using the text field, or by choosing a suggestion.
  13. Tap Next when done.
  14. You may have a prompt for a free trial of Cam Plus, or to attach your camera to an existing subscription. Tap Continue, and OK if prompted.
  15. Set up some automations on the Things to Try* page, or tap Skip and Finish.
  16. You’re all set. Enjoy your new Wyze Window Cam!

Things to Try: Tap Create or edit a device group, Share this device, Automate your device, or Skip. These are quick ways to set up a few automations before you finish setup. When you complete a task, it'll display a green checkmark ✅. You can move on from this page by tapping Skip.

You've completed the Wyze Window Cam Setup Guide. It's now time to mount your camera!

To mount your Wyze Window Cam:

  1. After pairing your Wyze Window Cam in the Wyze app, the Installation page will show.
  2. Verify that you have everything needed for installation. Tap Next.
  3. Go to your mounting location. Thoroughly clean and dry the inside of the window where you plan to mount your camera. Tap Next.
    Install on window glass only. Do not mount on a window behind a screen.
  4. Peel off the film from the mounting sticker. Tap Next.Do not trim the mounting sticker.
  5. Affix the mounting sticker onto the window. Tap Next.
    Stick the mounting sticker horizontally, to minimize glare and for the best image quality.
  6. Remove the protective plastic from the lens, then press the camera onto the mounting sticker. Tap Next.
  7. Route the power cable along the windowsill and/or wall with the included cable clips. Tap Next.
  8. Follow the in-app instructions to complete the setup process.
  9. Enjoy your new Wyze Window Cam!

You want to know what the different status lights mean on your Wyze Window Cam.

Wyze Window Cam Status Light Guide

Wyze Window Cam Status Lights: During Installation
  • Solid red – The device is powered on and initializing.
  • Flashing red – The device is ready to connect.
  • Flashing red and blue – Connection is in progress.
  • Flashing blue – The device is connected and finishing setup.
  • Solid blue – The device is working properly.
Wyze Window Cam Status Lights: After Setup is Complete
  • Solid red – The live stream is being viewed, or a recording is in progress.
  • Quickly flashing red – Siren is in use.
  • Solid blue – The device is working properly, and no operations are running.

Note: The status light is located on the front of the camera, under the lens. The camera status light will be turned off by default after setup to reduce reflections on the glass. It can be turned back on in the Advanced Settings.

Added to your cart
FREE shipping on orders $59+
Subtotal
$0.00
View cart